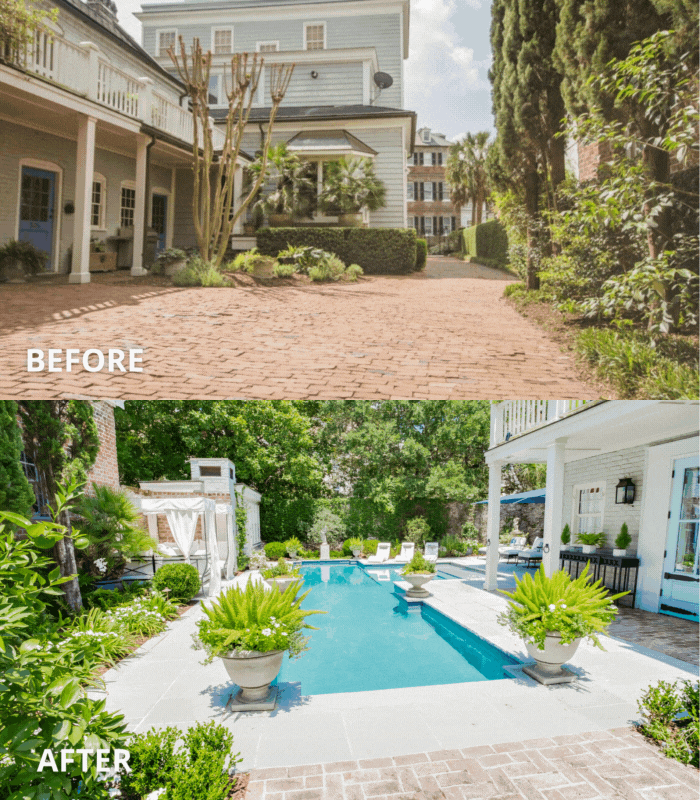
Photo courtesy of Patrick Brickman and Charleston Home + Design
Nothing is as exhilarating as beginning work on your dream pool – this is true for homeowners and our team. While the design phase is a time for exploration and ideation, the construction process is an opportunity to witness the meticulous attention and craftsmanship that will realize your unique vision. Understanding this work and its timeline helps create smooth work for all.
What is the typical timeframe for building an Aqua Blue Pool?
Great question! While pool construction timelines vary per project, a reasonable completion timeline for a gunite swimming pool is generally within three to four months of our team becoming site active.
Factors and considerations that may affect this estimated timeline include:
- Soil conditions
- Hazardous weather
- Pool size
- Accessibility to the job site
- In-ground vs. elevated pools
Regardless of pool style, our pool’s integrity and quality remain a priority through the construction process. If challenges or concerns arise that may affect timelines, you can rely on our team to communicate these to all parties involved.
From Start to Finish: The Stages of Gunite Pool Construction
Working closely with our clients and partners is of paramount importance. That’s why Aqua Blue Pools is committed to providing transparency and guidance every step of the way.
The following outline provides an overview of the typical custom gunite/concrete pool construction process and its various stages.
- Forming / Excavation: This first step involves forming three sides, then excavating while working a way out of the hole, and finally forming the final wall.
- Stub Plumb: This is the process of ensuring that all the necessary plumbing lines are correctly positioned and protruding from the ground at the appropriate locations before the gunite is applied for the pool structure.
- Steel Installation: Steel rebar is installed along the pool walls, floor, benches and steps to provide structural support and reinforcement for the concrete shell of the pool. The rebar grid is typically placed according to the design specifications and is tied together to form a sturdy framework.
- Bonding: This essential safety measure establishes an electrical bond between various metal components within the pool and its surrounding environment to prevent electrical buildup that could pose a risk of shock.
- Gunite Application: The gunite mixture is mixed onsite and then sprayed onto the prepared rebar framework. The gunite adheres to the rebar as it is applied, gradually building up to create the pool shell.
- Shaping and Finishing: Hand tools are used to shape and sculpt the gunite surface to achieve the desired contours and finishes, ensuring that the surface is uniform and free from imperfections. Once this process is complete, expect approximately four weeks of idle time so the shell can sufficiently cure.
- Tile Installation: Waterline tiles are installed to add to the pool’s aesthetics and functionality. Aqua Blue Pools offers a wide selection of tile designs to enhance the look and feel of your custom oasis.
- Coping Installation: The border of the pool, otherwise known as coping, is installed to provide a finished look. Stone, brick and concrete are popular materials for this perimeter.
- Deck Installation: Decking is installed next, uniting the new installation with the surrounding landscape and home for a cohesive and luxurious look.
- Equipment Set: The “equipment setting” phase sees the installation of various mechanical and electrical equipment vital for pool operation and maintenance. This phase typically occurs after the shell has been constructed but before the pool is filled with water.
- Interior Finish Application: A durable and aesthetically pleasing surface is applied to the interior of the pool shell. This finish enhances the pool’s appearance while providing a waterproof barrier and improving comfort for swimmers.
- Testing and Calibration: All pool systems are set up, tested and calibrated for optimal functionality and safety. This is crucial to ensuring all components are functioning properly and that the water is safe and balanced for swimming.
- Enjoying Your New Pool: This is the final (and everyone’s favorite) step. Once your pool’s system is fully operational and the water chemistry is balanced, you can begin to enjoy your new pool!
By understanding the pool building process and timeline, you can embark on your journey with confidence, knowing what to expect every step of the way.
Let’s Dive Into Your Custom Pool Project
As the Lowcountry’s premier custom pool builder, Aqua Blue Pools is ready to help you realize the pool of your dreams. Since 1991, our team has built pools in a range of styles for residential and commercial clients in South Carolina. We are proud to work closely with our clients to create and execute impressive custom projects built to last. Contact us today to begin planning your oasis!


